I approach this not with regrets but with many happy feelings about how we took a run-down, bank-foreclosed property and made it into a home.
Remember this is what the house originally looked like! Yikes!
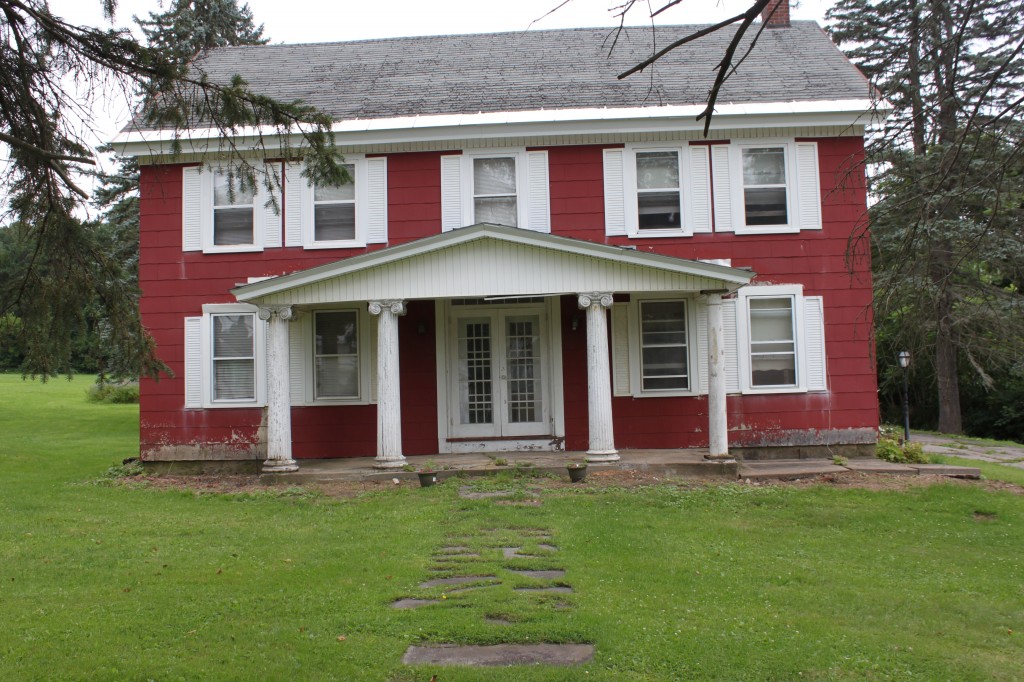
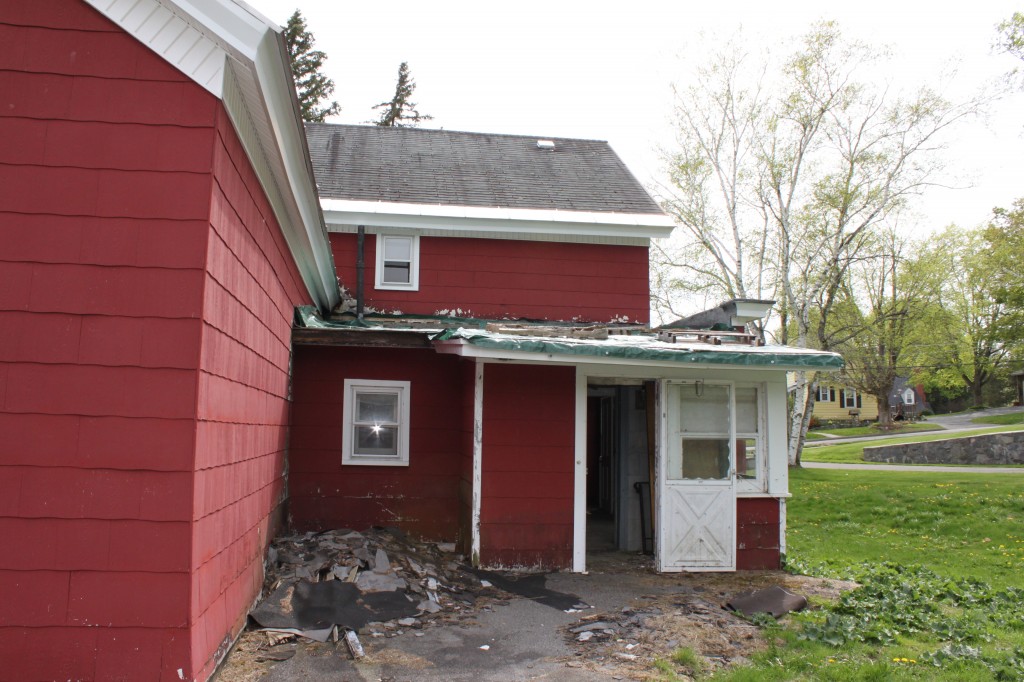
THE BIG RED MESS
This is what the house looks like now!
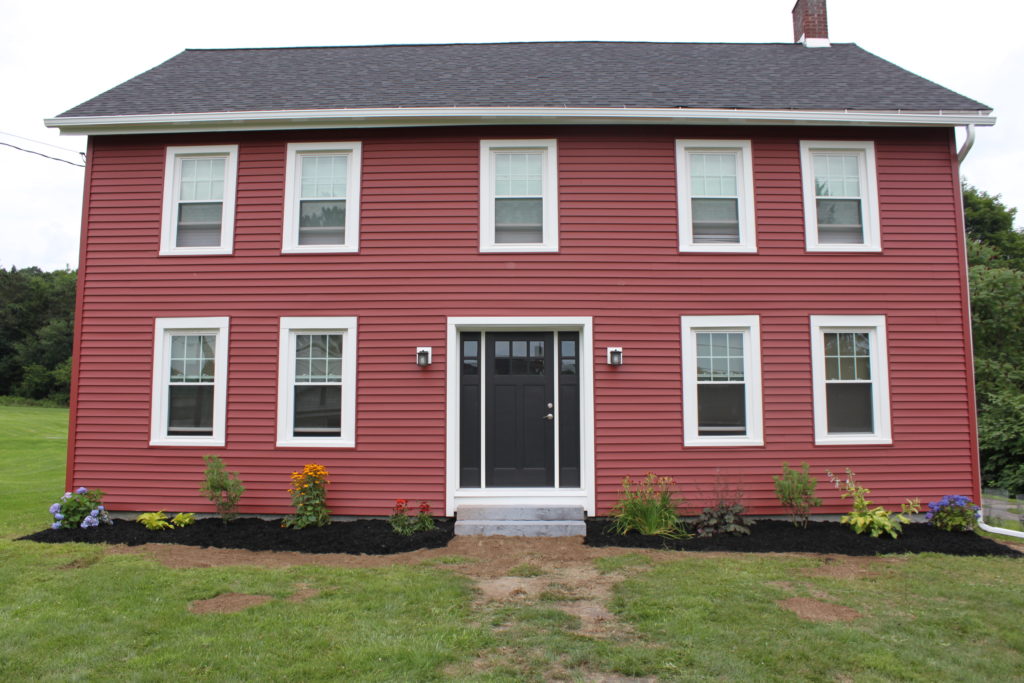
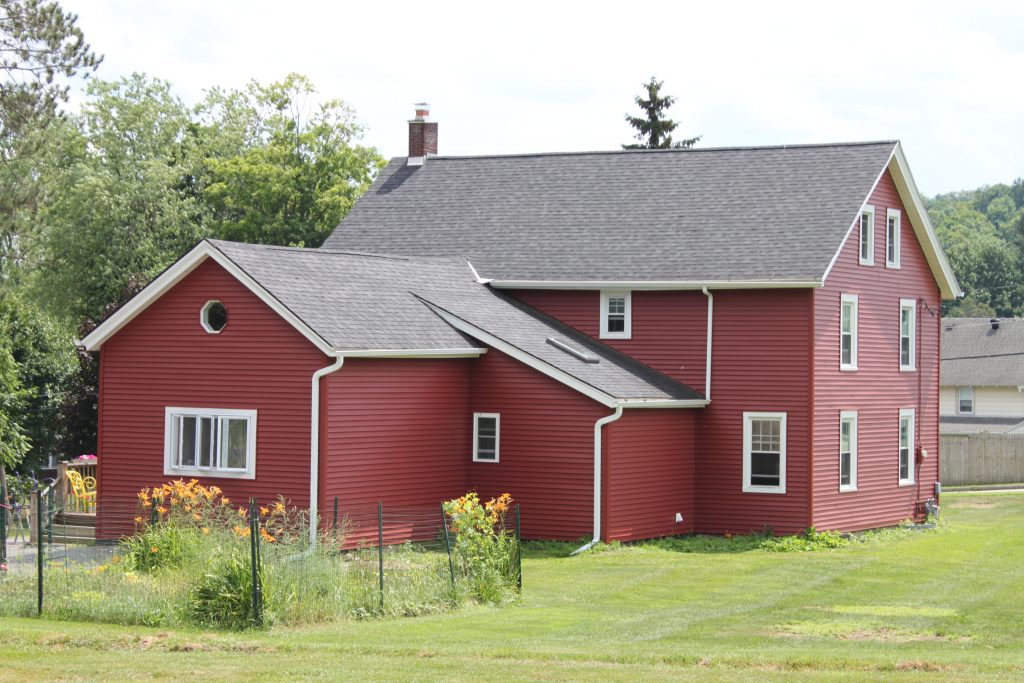
Yes, we still have a few projects to complete (after all it is a house that was built in the 1850’s!) but a few things have transpired which has given me inspiration to write about other things.
First and foremost, Lynn and I moved to the “Red House” permanently on June 27, 2019. Second, the point of The Red House Project blog was to describe in detail all the problems we had with renovations or contractors or just life on the property. Over the years I also included some stories about our road trips or food-related articles, always trying to tie the stories into whatever project we were facing back home.
I loved writing about the house and the many challenges we faced throughout the renovation. I think I succeeded in making the blog a fun read. Hopefully, I also brought to life some of the characters I chose to write about as I tried to portray them as helpful, yet quirky, personalities. Going forward I have decided to write more about food and travel and anything that strikes me of interest in the Mohawk Valley.
The Red House Project blog will still remain online there just won’t be any further posts.
For the past nine years I have loved living in this Red House, even if it was only for long weekends or during the summer months. This passion, I hope, will never leave me. That said, I’ve created a new blog, “Let’s Go!” that I hope will entertain you as I know the Red House did.
Here’s a link to my first post about the move. So “Let’s Go.”
]]>
Ironically, this was the first long weekend since we bought the Red House (yes, that would be seven years) that both kids and their respective girlfriend and boyfriend were coming to visit. That means that when they arrived right around cocktail hour when we should have been toasting the start of the weekend, we were actually scrambling for flip flops and rubber boots for everyone to wear and a wet/dry shop vac we could plug in without getting someone electrocuted. Did I mention we needed at least 3 brooms so we could take turns pushing the rising water towards the sump pump that while going was simply not keeping up with the insane amount of water?
After a good hour of trying to keep up with the water flow, we decided to stop and luckily at this point the rain stopped, the sun came out, and I was able to show them the garden and the FINALLY FINISHED MASTER BATHROOM.
We have lots of gorgeous looking lettuce.
 And the biggest sage leaves I’ve ever seen.
 Coupled with so many beautiful flowers…

 As well as celery and some very green tomatoes.

 Meanwhile after the garden tour, they got to see the newly finished master shower and the dining room table Lynn and I put together the night before although the dining room itself has quite a ways to go.

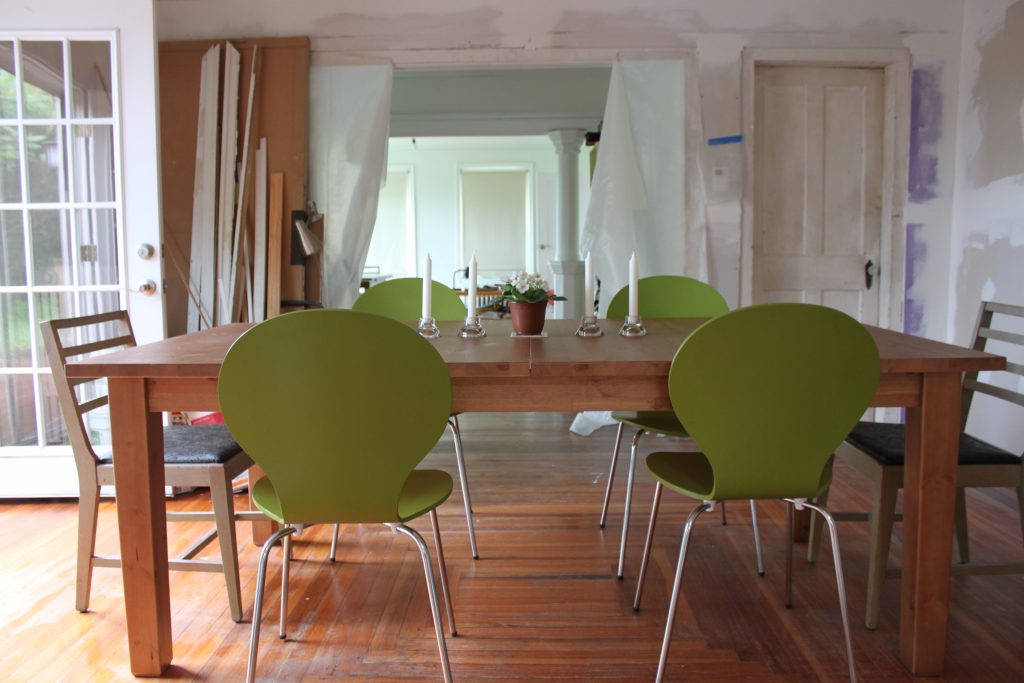 We picked up those green chairs at a garage sale on Long Island ($15 for 4!) and like the color so much that when we buy “real” dining room chairs they obviously have to be this exact shade of green. (I know, I know, this will be difficult but the “tastemaker,” aka Lynn says it is possible.)
But back to the flood. Even though the Red House sits fairly high up on a hill and when the bamboo dies in the winter we actually have a pretty view of the houses in the valley below. The problem is the house is also directly in the path of nearly 4 acres of sloping fields. So when the water runs down the field, we get a flooded basement and this time a “lake” on the side of the house. Looking at all the water, we suddenly remembered a pipe that had been buried in the grass that we decided to dig out – thinking we could channel some of the water to the pipe.
 This resulted in a ditch being dug the length of the property and more water than I’ve seen in our backyard. Luckily, the guys helped dig out the ditch which was a dirty muddy mess. (The girls decided to put up a volleyball net since after all it was 4th of July weekend!)
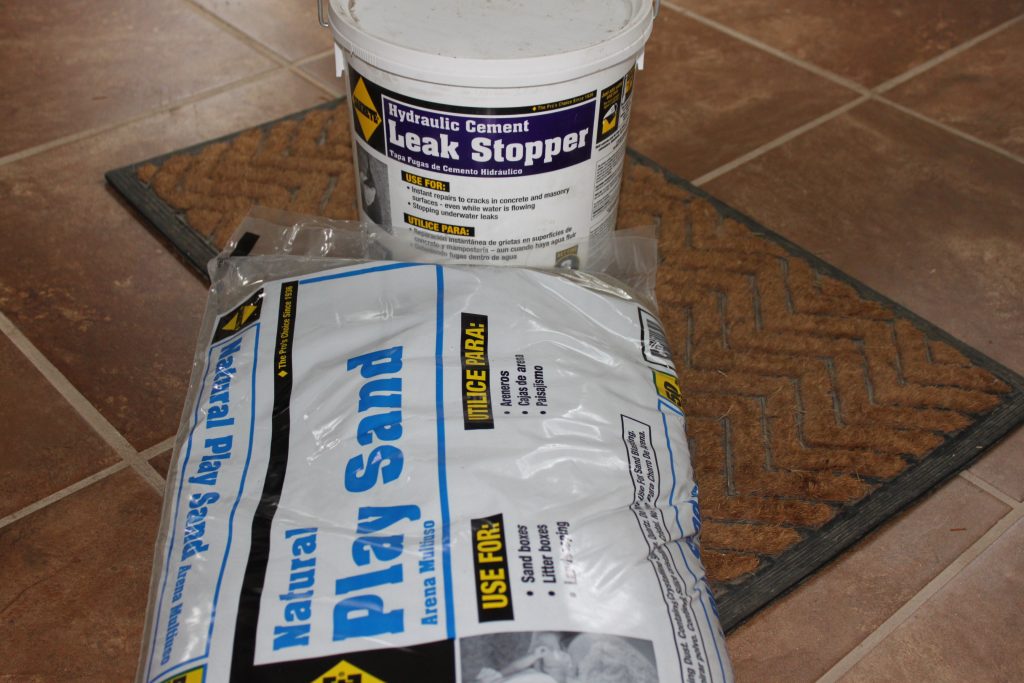
 The theory was if we could divert the water away from the house, we hoped we wouldn’t be spending another 4th of July making sandbags. While we did manage to eventually stop the flow of water, we were worried that there weren’t enough sandbags around the new furnace and hot water heater. So after the kids left, I ordered sandbags online and we drove down to the Big Box store to buy sand. This time however, we carried the 50 lb bags of sand into the basement and made the sandbags there instead of stupidly making them in the driveway.
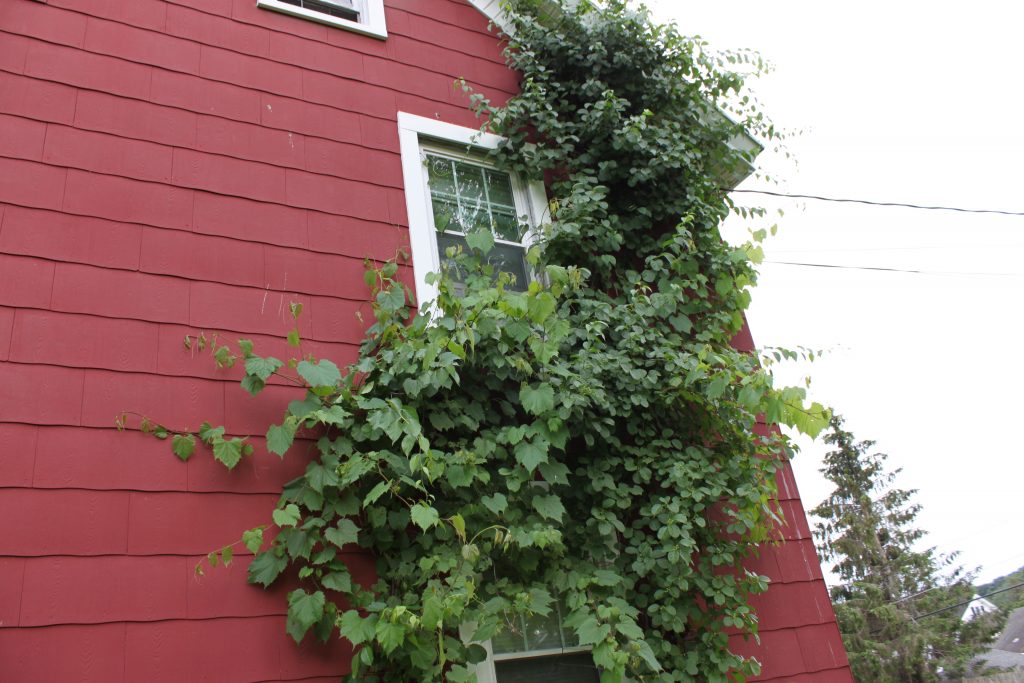
 We also tried to shore up the basement window by putting a large metal window well in front of it but then got side tracked cutting down all the beautiful vines that were growing on the side of the house. (We rarely go on that side of the house so weren’t even aware how incredibly tall they had grown!)
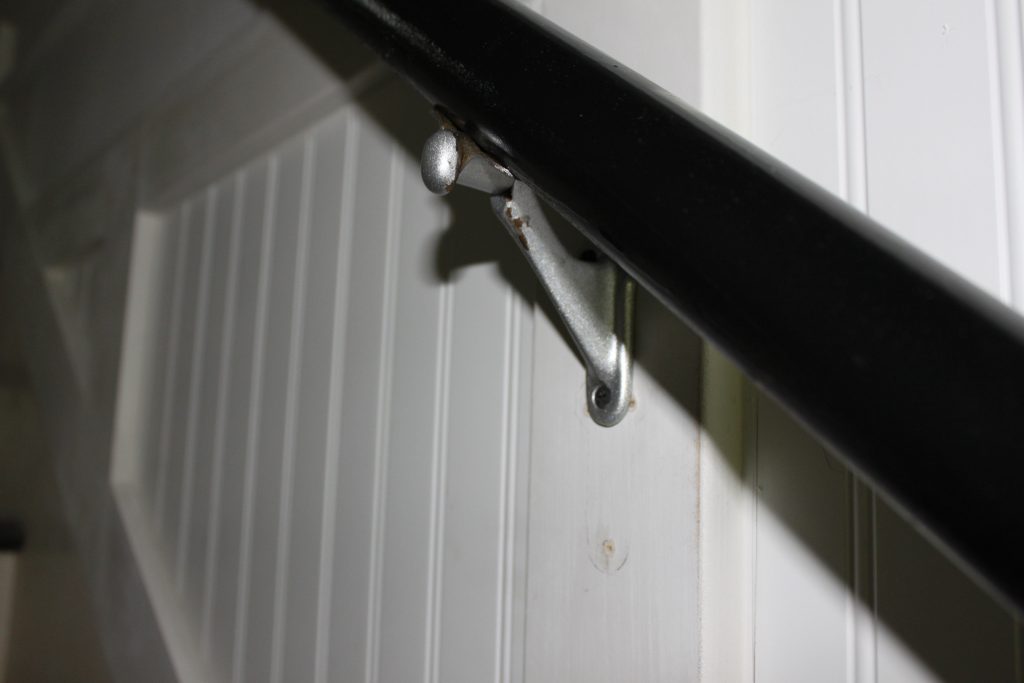
 Meanwhile, we finally have guest bedrooms for people to stay in, comfortably I think, as well as two finished bathrooms with one to go. Lynn also put back the railing leading up to the second floor and even spray painted the hardware! Whoops, this close-up reveals a spot he missed.
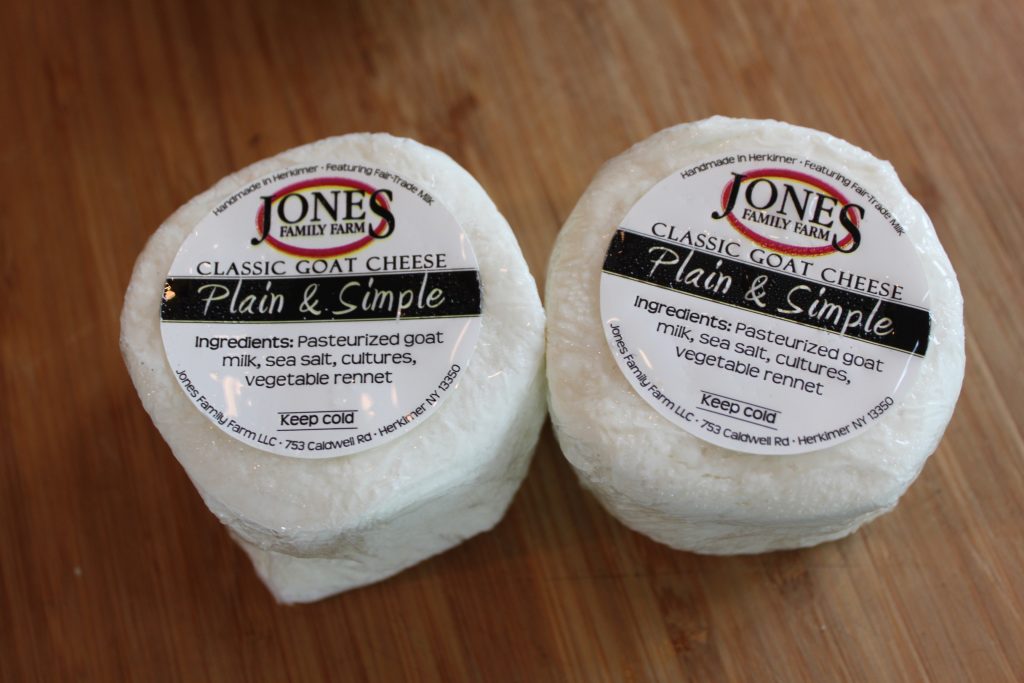
 I also did some baking (blueberry muffins and zucchini bread) which as everyone knows I loathe (not the goodies but the act itself). And put out lots of good cheese from Jones Family Farm for everyone to nosh on before dinner.

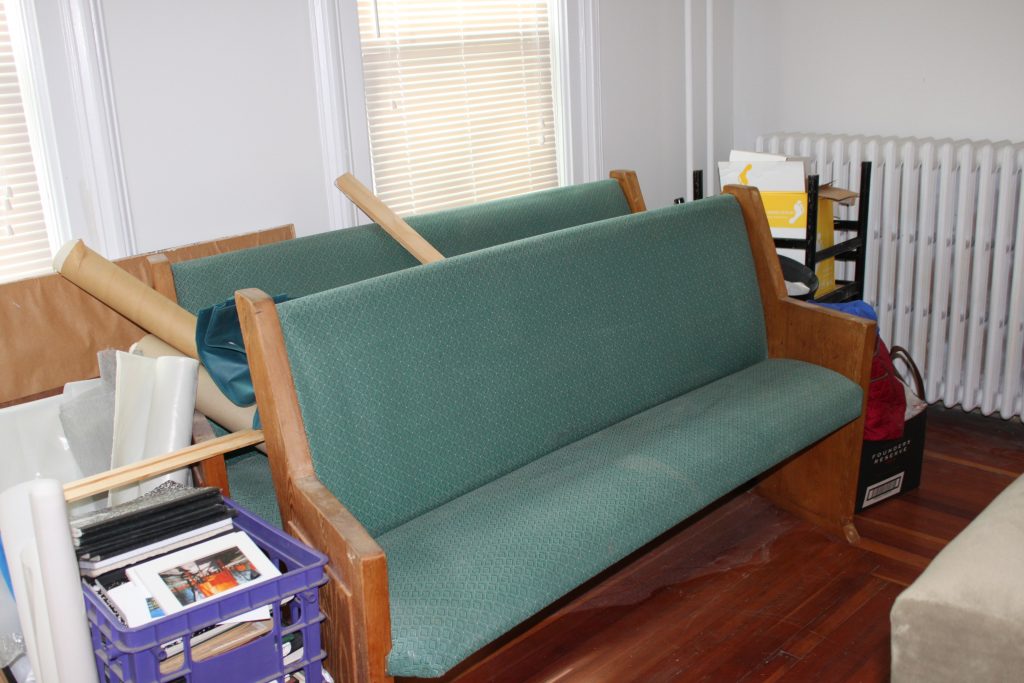
 Meanwhile, we started to clean out the TV room, dragging boxes of stuff up to the attic on the hottest day of the year (of course) a few weeks ago, but are still left with the church pews that we thought we could use in the kitchen but that didn’t quite work. (Anyone who wants them kindly message me – they’re free!)
 Meanwhile, all this bad weather at the Red House has made us a bit paranoid about rain which is annoying only in that rain has never deterred us from doing any activity or road trip in the past.
Since we are still waiting for a date for our siding to be installed, we probably need to spend a day or two outside patching up holes in the foundation and maybe learning how to re-grade the slope around the house. Why do I already know this absolutely won’t be any fun at all. At least if we are working outside, I can look at the sumac that’s slowly turning red, just in time to (hopefully) match the new Red House siding.
 Happy Summer!
]]>
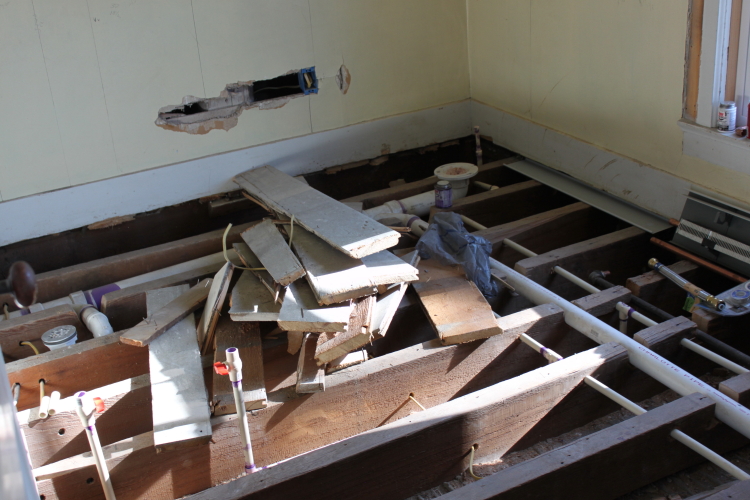
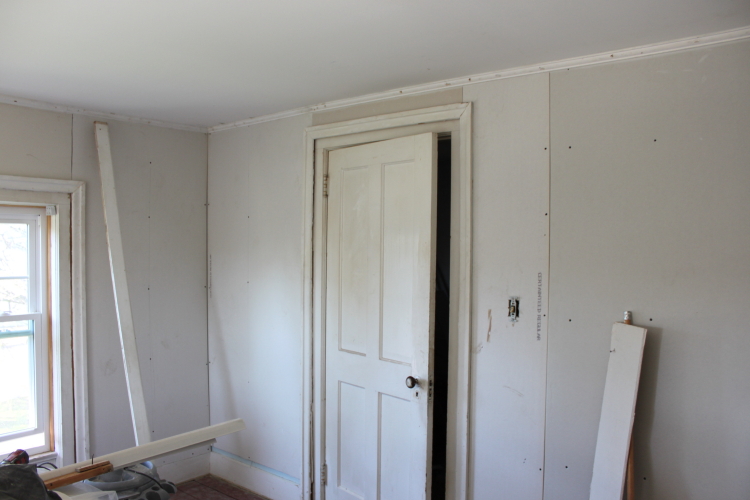
 I wish I could report that we’ve made progress in renovating the Red House but unfortunately at this stage in the game (meaning the complicated stuff), we’re very dependent on our contractor to finish our upstairs bathroom. This means while most of the plumbing has been installed, the insulation needs to be put in the walls before the sheetrock and then tile are applied. As you can see not much has changed in this room since the last time I photographed it!
 Apparently since our contractor has a lot of outdoor jobs that he’s scrambling to get finished before the weather takes a turn for the worse, I do have to give him some slack. He has assured me that I’m #1 on the top of his list when he finishes with everyone else. Being me (frighteningly straightforward and to the point), I also reminded him that last winter he complained that he couldn’t get into the house without shoveling a path to the door because of all the snow. (I don’t have anyone who plows for us and don’t intend to incur that expense either!) I also suggested since he obviously didn’t want to spend half of his day shoveling when he could be inside working on a room, he may need to speed things up a bit.
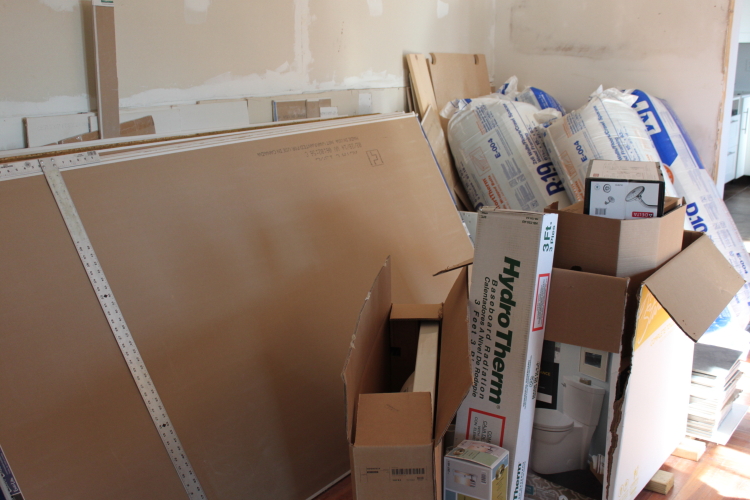
I would also love to start working on the dining room. But since all the materials he needs to complete the bathroom are sitting in the dining room, this room, too, has to wait.
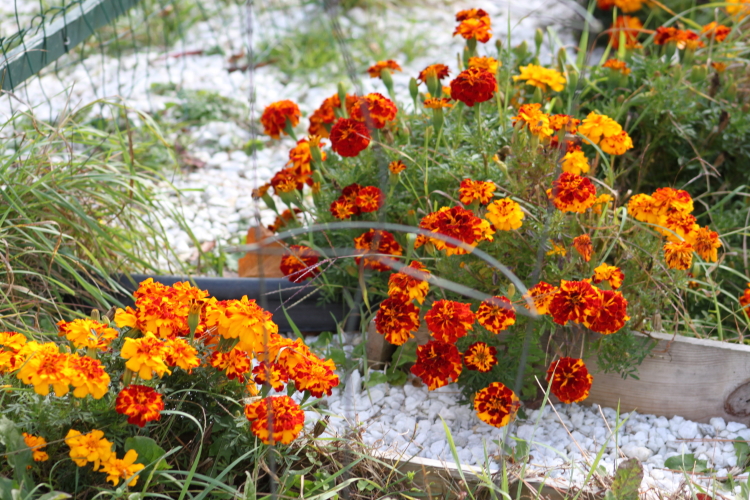
 While the leaves are turning, the marigolds seems to be thriving in the garden, the weeds even more so and with all the asparagus ferns cropping up, I’m thinking I’ll have a very nice asparagus harvest in the spring indeed. I’ve decided however, after planting two seasons of garlic in the fall, I’m going to wait until the spring to do it this year and see how that turns out. Reason being: Lynn is busy trying to finish our master bedroom (that means even though he took off all the moulding around the room and put everything back up, there is still a lot of patching that needs to be done as well as taping, spackling and finally painting.
 To pull him away from this to get out the tiller (I’m afraid of the tiller it kind of drags me across the field) to plant some garlic seemed dumb. So the garlic will wait until the spring to be planted along with whatever else we can manage to grow in hopes that the deer, rabbits, squirrels and even a local cat or two won’t devour everything we’ve planted.
What is particularly nice about living up here especially in the fall are all the farmer’s markets as well as field after field filled with pumpkins in lovely shades of orange.
 Last year I was lucky enough to grow a couple of pumpkins. This year I had to buy one.
 Since the weather is turning colder (it was barely 55 degrees when we arrived this Columbus Day weekend), I’m also thinking of food that will warm us. That would be soups (pea and lentil), stews (goulash and chicken paprikash in particular) and lots of carbs like mashed potatoes and macaroni and cheese! And while I do try to stay away from sweets as much as possible – I have been thinking of making cinnamon rolls (no, not the kind you bang out from those icky cardboard containers in the refrigerated section of the supermarket) but cinnamon rolls made from scratch.
For those readers who have children or other instances where your household size shrinks from 4 to 1 or 2, I can say that I’ve finally mastered cooking for just the two of us without a huge amount of leftovers. And if we do have have leftovers, it’s because I’m usually trying to make sure at least one of us has something to take to work for lunch the next day. The problem with this cooking for 2 instead of 4 (or more) thing though is that there are simply dishes (particularly desserts) that just don’t get made anymore. Why bake a batch of brownies or oatmeal raisin cookies if there aren’t any teenagers around to eat them all in a single sitting? Did I mention I’ve been craving cinnamon rolls?
In the meantime, I picked the last of the tomatoes (still green) from the Red House garden.
 And admired not only the meadow but how pretty the marigolds still looked in the garden.
 And since it was rather chilly, I also decided to make some Braciole stuffing the meat with slices of mozzarella and some smokey ham.
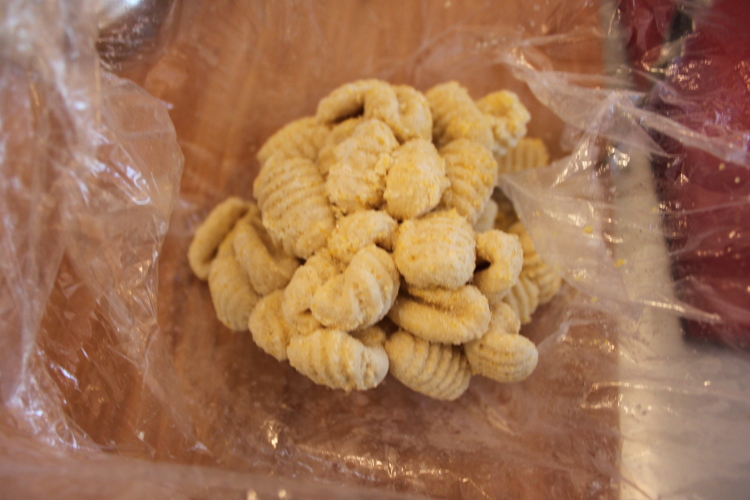
 I managed to find a few (albeit slightly bruised) leaves of basil still growing in the garden and found a bag of potato gnocchi we buy at a little Italian deli near the Red House for under $3 a bag that was still in the freezer from the summer.
 Did I mention even as I was cooking the gnocchi and Braciole I was craving cinnamon rolls?
On a completely different note. We have a neighborhood cat who shows up like clockwork between 5 and 5:30 on the weekends we are here. He or she slowly meanders to the back of the property seemingly looking around for maybe a tasty little mouse or some other morsel to eat. Now, this cat is really the slowest cat I’ve ever seen so it was particularly funny when I tried to take a picture of the cat and suddenly the cat took off at an amazingly fast pace.
 I followed the cat as it walked the length of the property and found myself staring at the stainless steel rolling cart we’ve been using in the kitchen as a table/work counter since we still don’t have countertops for the kitchen cabinets. Wouldn’t that surface be just fine for rolling out dough?
Since I also don’t have any cookbooks up at the Red House (I know that’s old school but I still use them!), I dragged out my laptop and followed a recipe from the Pioneer Woman for Cinnamon Rolls 101 online.
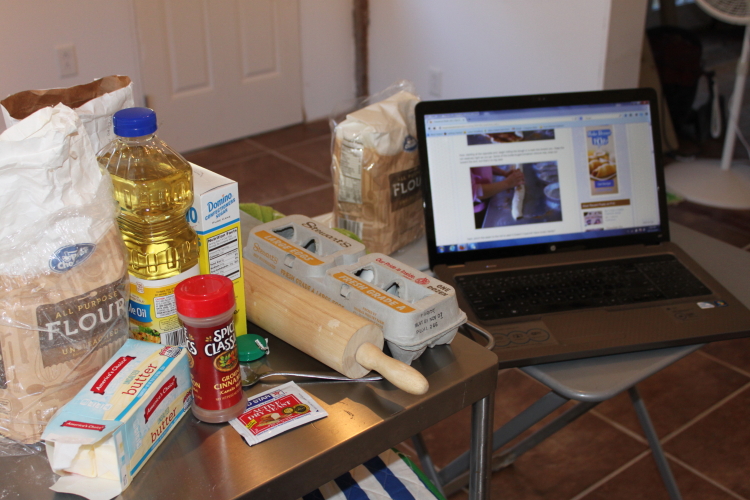 And yes, I already did have all the ingredients on hand so this was a really easy recipe. I mixed everything together and tried to follow the instructions but the dough just seemed a little bit too wet so I added more flour than called for. The dough rose, I rolled it out, layered it with melted butter, sprinkled on some sugar and lots of cinnamon just like the picture online.
Except I wanted to add some apples to my cinnamon rolls so I did just that.
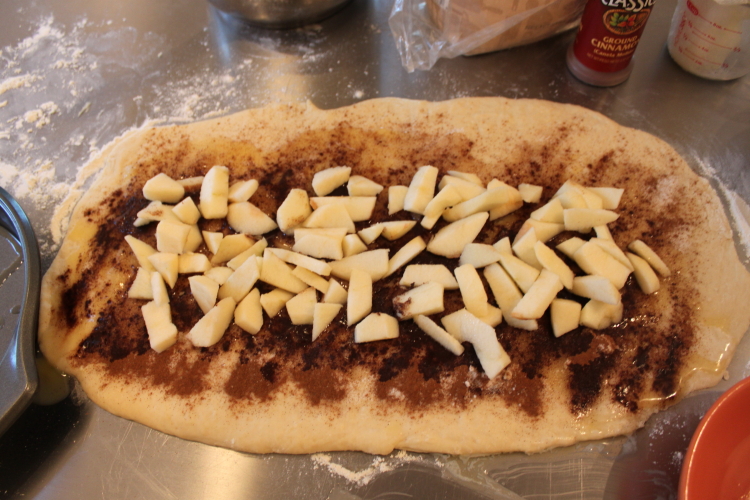 Really, doesn’t this just look yummy?
I rolled the dough into a log shape, cut the log into slices, and arranged them in a pie pan. The dough seemed a bit wetter than it probably should have been but I figured it would “correct” itself when baking.
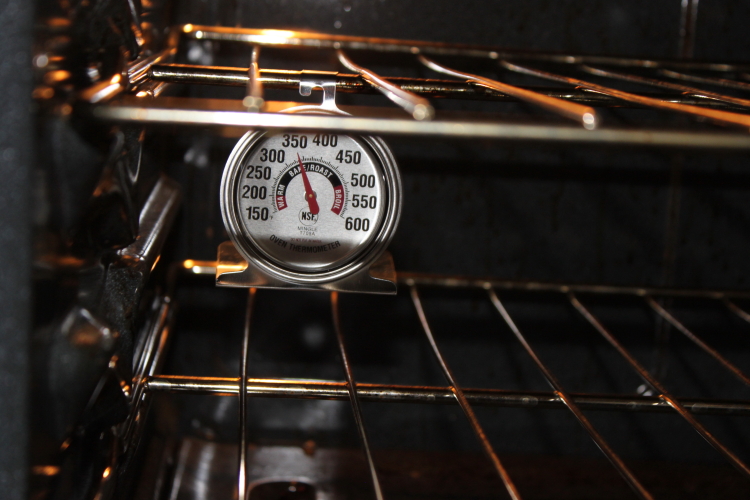
I’ve always had a problem with every oven I’ve ever owned and this one is no different. I read a recipe and it suggests a cooking time of say 15-18 minutes and when I peek at what I’m baking, 9 times out of 10 I need double the amount of baking time indicated. Since I was convinced that the thermostat in this new oven wasn’t working properly, I actually went out and bought an oven thermometer. I’d like to say the oven was off, but actually the temperature was exactly what it was supposed to be.
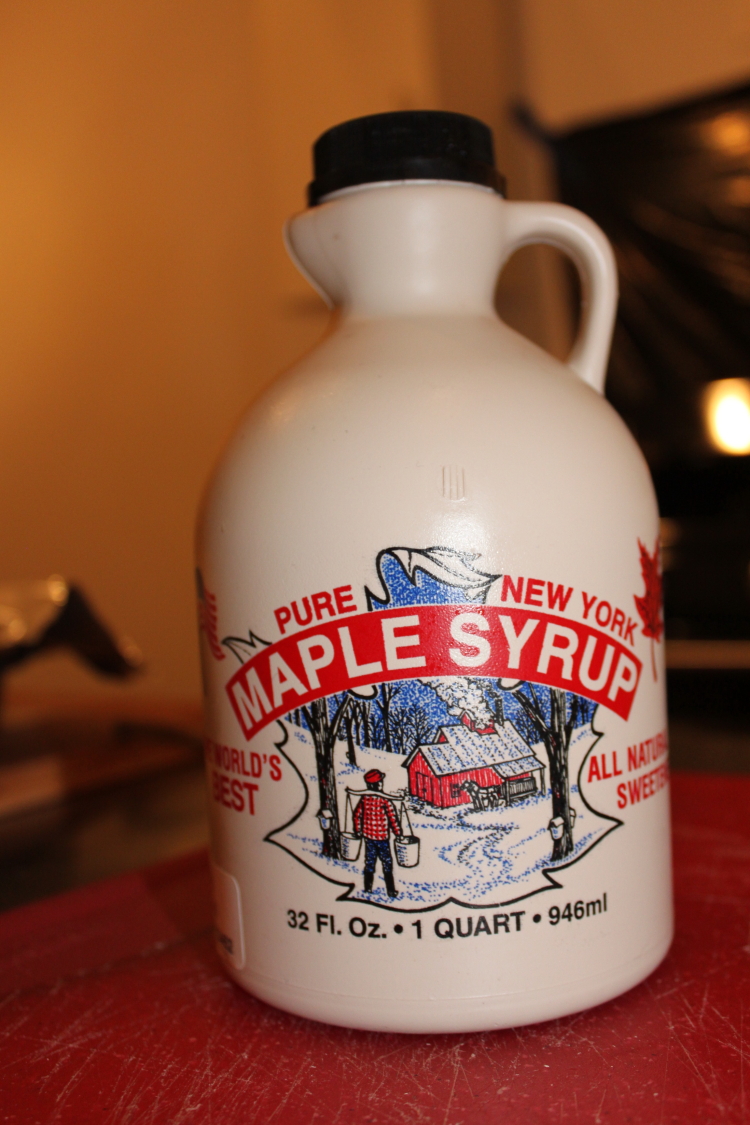
 So back to the cinnamon rolls. The recipe called for adding “maple flavoring” to make the frosting. Ha Ha Ha. Living in Upstate New York, I don’t need “maple flavoring,” I can use the real stuff. So I did, mixing maple syrup together with some powdered sugar and milk.
 The rolls came out of the oven, I frosted them, and here’s what they looked like.
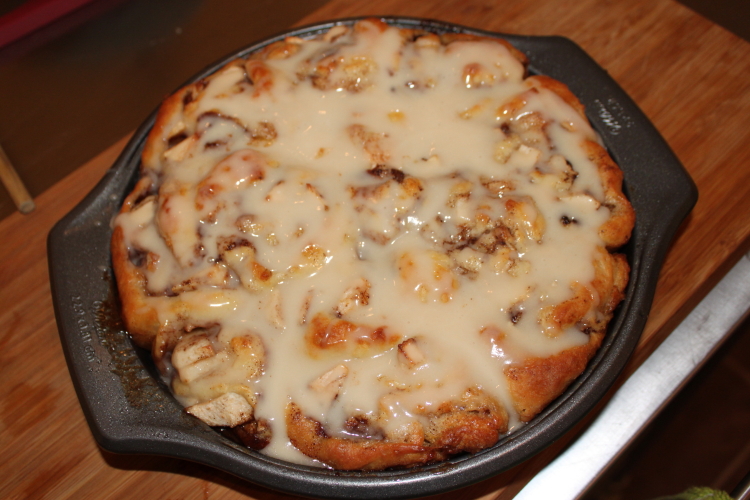 Yes, they looked delicious but when we ate them in the morning for breakfast (after sticking them back in the oven to warm up a bit), they were a tad too gooey inside! So even after following the recipe and adjusting the baking time and having for the first time ever a second thermometer inside my oven to make sure the temperature was correct – these rolls needed to be baked a bit longer. (We ate most of them anyway, no worries!) So like the cat that prowls our property looking for tasty tidbits, I got mine too this weekend.
Finally, knowing that winter is literally around the corner up here, it’s awesome to drive a mere 5 minutes from the Red House and see the leaves changing, some late summer flowers still blooming and the water in the creek flowing so beautifully. What we’ve learned up here the last 4.5 years is to enjoy every minute of it.


]]>
Even though we weren’t having a big gradation party, I still had to take a day off from work to do all the cooking. Now remember, I’m the girl who doesn’t blink an eye about making Thanksgiving dinner in under four hours (even with all the side dishes) so I was surprised that making everything for graduation took me nearly twice that long.
First problem of the day was that we were in the middle of a heat wave. I should mention that in all the years we’ve lived on Long Island, we’ve made do with old school box fans, coupled with a window fan or two.

Old School Box Fan
This I realized was not going to work when the temperature both in and outside the house was over 90 degrees! (Yes, I actually went outside to my car to take a picture of the temp!)

It’s Definitely Hot!
So, Lynn decided to haul out our really big air conditioner and set it up in the living room, hoping a bit of the cold air would waft into the kitchen (it didn’t), when I realized that when I started to make the chocolate-covered strawberries, I forgot I left the chocolate in my pantry! Imagine how not funny it was to discover that the chocolate had completely melted inside the wrapper and going to the store for more wasn’t an option. So, I simply squeezed what chocolate I could out of the wrapper (don’t all good chefs do that?) and voila, the double boiler cooking time to “melt” the chocolate was cut by 99%.

My Melted Chocolate Mistake
I quickly got the chocolate to stick to the strawberries and popped them in the refrigerator but was melting myself since for reasons known only to the baking gods I had also decided to bake:
1) Regular bread
2) Zucchini bread
3) Pound cake
4) Brownies
5) A cherry cake
6) Carrot cupcakes with cream cheese frosting.

Home-made Bread
While all of this was either baking, mixing or waiting for one of these two steps to happen, I also was trying to set the table and put together a three-tiered cardboard dessert tower.

Wilting Rose Table Decorations

- Baking…

- The Dessert Tower
Now, everyone who knows me, knows that I absolutely detest baking. I mean, yes, I can do it but all the mixing (butter, eggs, flour, etc., etc.,) is just not fun! Yet, I still do it. And while the brownies were from a box, everything else was made from scratch. The cherries I needed for the cherry cake needed to be pitted by hand, the zucchini bread needed to be closely monitored since at the last moment I decided to make them miniature size and wasn’t too sure about the cooking temperature, and my favorite Bundt pan (the one I normally bake the pound cake in) had mysteriously disappeared one day on the Long Island Railroad (don’t ask.)

Fresh Cherries For the Cherry Cake

- Miniature Zucchini Breads
I mean really, anyone else who was sane would have simply ordered a cake from a bakery and that would have been the end of it. Don’t my “slightly” chocolate covered strawberries look nice, though?

Chocolate Covered Strawberries
I did manage to get through all the baking and the heat and even made dinner, too, on top of all the desserts.

Aerial Shot of some of the Desserts
This past Thanksgiving as I was baking in my house on Long Island (a task I don’t particularly like by the way), I started to think of what it would be like to be at the Red House to celebrate a holiday. Actually, what I’m really thinking about is the view I have from the Red House kitchen that looks out onto the meadow and up to the forest. As I was kneading dough and mixing batter on Long Island, I glanced out of a kitchen window that reveals nothing more than a white fence and lots of ugly houses. Although I see them, I don’t. I see my meadow.
Even though I wasn’t cooking Thanksgiving this year, I still wanted to bring something to the table. That’s why the Wednesday before the holiday, I found myself making bread (The New York Times recipe they published November 21, 2007 entitled Simple Crusty Bread), a dried cranberry and apricot tea bread I found online, and an old Hungarian family recipe, kolach.

Simple Crusty Bread

Cranberry Apricot Tea Bread
A few years ago I finally typed up my grandmother’s handwritten kolach recipe because it was beginning to fade and I was afraid it would eventually just disappear. Making kolach in our house is usually a once-a-year affair, simply because of the effort involved.
When I pulled out my grandmother’s recipe this year, I noticed for the first time that it was dated November 22, 1960. I wondered if she too had wanted to prepare something special for Thanksgiving. Here’s her recipe and my sorry attempt to photograph the finished product. If anyone wonders why there was only half a loaf left in the photograph, it’s because three loafs were gifted and I ate nearly half a loaf myself the day after Thanksgiving! Yes, it’s really that good.
November 22, 1960
Kolach
1 package dry yeast
1/4 cup luke warm water
1 cup milk
1 cup butter melted (2 sticks)
3 egg yolks slightly beaten
1 teaspoon salt
1/3 cup sugar
4 cups sifted flour
Nut Filling
4 cups ground nutmeat (walnuts)
1/3 cup sugar for each one cup of nuts
3 egg whites beaten stiff
1/3 cup milk (more if needed)
1 cup raisins (generous)
Dissolve yeast in water. Mix melted butter, egg yolks, salt and sugar in large bowl. Add milk. Add flour and beat thoroughly until dough comes clean from hands. Let rise for a minimum 4-5 hours. Cut into four pieces and roll each piece on a floured board into a rectangle. Spread filling over dough. Roll like a jelly roll. Brush with 1 egg slightly beaten. Bake in moderate oven 350 degrees for 40 minutes.
Makes 4 nut rolls (medium-sized)

Kolach Dough

Nut and Raisin Filling

Kolach Loaves
Some notes about the recipe:
Originally the recipe called for scalded milk. I realized that this was probably because the milk she was using wasn’t pasteurized. My grandmother would also occasionally put the dough in the fridge which defeats the process of having the dough rise. (Somehow, still the kolach would turn out fine.)
There are also three other filling variations that can be used but the nut/raisin combination is my favorite. She mentions using “nutmeat” in the recipe. I’ve always used walnuts and I’m not quite sure what other nut she might have used. My mother has made kolach with a prune (Lekvar) filling, apricot filling and poppy seed filling. Making the fruit fillings is as simple as buying a jar of prune or apricot preserves and spreading it on the dough. The poppy seed filling is made by Solo and comes in a can (which you can even buy online these days!) but I think it’s kind of nasty.
Finally, while she generally cooked the loaves for 40 minutes, my oven is temperamental and sometimes it’s taken closer to an hour.

Kolach - What's left!
I did have a watermelon that a new neighbor had given me a few days ago as a housewarming present (thank you Sue!) but the reality is I wanted something zaftig. Looking in the fridge I found lots of overripe fruit – blueberries, nearly a pound of cherries and a couple of peaches. Could I whip up some sort of fruit pie with these leftovers? Without a stove to bake them in?
Earlier in the week I had gone to an “antique” (mostly junk) store in the area to see what kinds of things they were selling. I ended up buying a funky tray with pictures of the Chateaux of the Loire Valley ($2), a pretty yellow creamer ($2) and a set of four dark green gratin dishes ($5). Since I had made a zucchini and tomato gratin for dinner one night, I knew at least one dish would fit in the toaster oven. Could I do a pie in a gratin dish?
I realized I hadn’t made crust by hand in a long time. Usually I put the flour, butter and ice water in a food processor or my KitchenAid mixer. Up at The Red House I had access to neither. I needed to make the crust the old school way so I put flour and half a stick of butter in a bowl and using two knives cut the butter up into the flour until it was crumbly.

MAKING PIE CRUST
Adding a bit of ice water to the mixture, soon I had the dough for the pies. It was a little looser than I was used to so I wrapped the dough in wax paper and stuck it in the fridge for about 20 minutes.

AFTER LETTING THE DOUGH REST
In the meantime, I cut up the peaches and tossed them with the blueberries and a couple of tablespoons of sugar. I washed the cherries, took out the pits and tossed them with some sugar, too.

THE FRUIT
By then I retrieved the dough from the fridge, cut it in half and rolled out each half into an oval shape. I spooned each of the fruit mixtures into two of the gratin dishes, then placed the dough on top of each dish. Using the tines of a fork, I flattened the dough around the dish and made a decorative edge.
Since the toaster oven was small, I could only bake one “pie” at a time. Even at a 400 degree setting (or so the dial on the toaster oven said) this took about 35-40 minutes a piece. I kept checking the crust to make sure it wasn’t burning and when I thought it was done and lightly brown I took out the first pie and popped in the second.
And how were they? I thought they were pretty damn good. And the ice cream I bought? It was perfect as an à la mode topping.

TOASTER OVEN PIES!
]]>